Introduction: Your Journey to Flawless Makeup Starts Here
The process of learning about how to apply makeup isn’t easy with the myriad of products and methods that are available, however everyone begins at some point. If you’re a total beginner trying to learn the basic techniques, a teenager testing out your first look or a person looking for solutions to specific skin issues this guide will help you navigate the procedure step-by-step. We’ll discuss everything from the preparation of your skin to achieving an lasting look and ensure that you acquire confidence and the skills to create styles that highlight the natural appeal of your skin. With these techniques learn how to apply makeup that is elegant and at ease for any event .
Getting Started: Essential Preparation Steps
The Foundation of Great Makeup: Skincare First
Before you think about the makeup products you need to get your canvas ready. A proper skincare routine is the essential first stage in any makeup routine. Imagine trying to apply makeup on a flaky, dry or oily surface, regardless of how costly your products are, the outcome will not be perfect. The same applies to your face .
Start by cleansing your skin with a gentle cleanser suitable to your skin type, then followed by a light moisturizer. If you’re suffering from rough skin choose an oilier cream, whereas those who have oily complexions must choose oil-free, moisturizing formulas. Make sure you remember this vital procedure: apply sunscreen and allow it to fully absorb before applying makeup. The protection from sun damage prevents the long-term effects and helps keep your skin healthy .
- Cleanse Cleanse: Get rid of impurities and build a clear base
- Moisturize the skin to stop makeup from adhering to dry areas
- Protect Use SPF 30+ broad-spectrum to protect against UV-induced damage
- Wait 5-10 minutes for products to fully absorb (5-10 minutes) prior to applying makeup
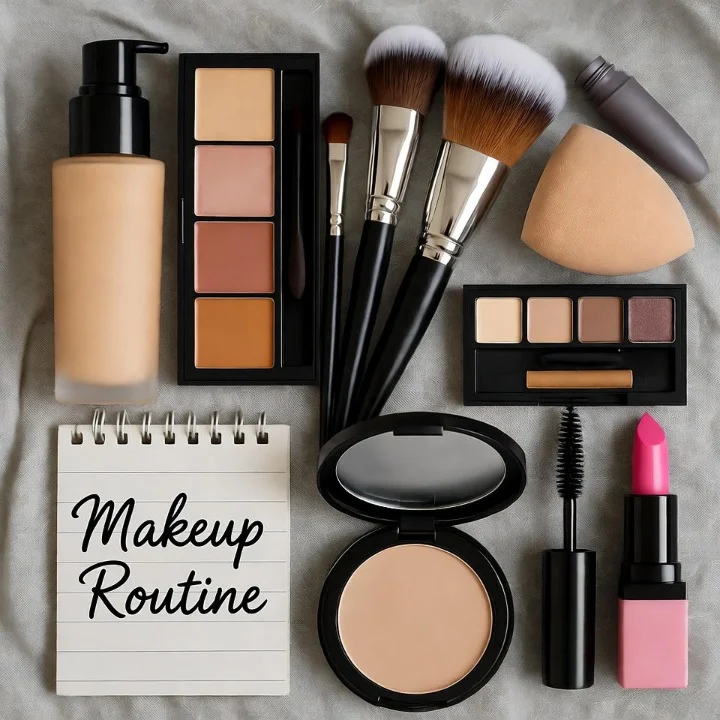
Gathering Your Tools and Products
There is no need for a professional kit to learn the art of applying makeup however having the right tools can make a big difference. While fingers work well for some makeup products, specially-designed tools aid in the precision and blend .
The most important tools available to novices:
- Brush for foundation or damp beauty sponge
- Eyeshadow brushes (a blender and shader that is flat, as well as a fluffy blender)
- Powder brush
- Brush for brows with a Spoolie
- Eyeliner brush (if using gel)
Makeup essentials checklist:
- The foundation you choose to match your skin tone
- Concealer one shade lighter foundation
- Setting powder
- Neutral eyeshadow palette
- Mascara
- Brow product
- Blush
- Lip color
Crafting Your Perfect Base: Foundation and Complexion
Choosing and Applying Your Foundation
Choosing the correct foundation formula is essential to achieve your desired appearance. Foundations that are liquid can be used for all skin types and provide a an adjustable coverage. Cream formulas are ideal for dry skin and powders are suitable for oily skin. If you are testing shades, do a swatch around your jawline and test in natural light. The ideal shade disappears on your skin .
The method to use liquid foundation like a pro
- Begin with less than a few dots in the center of your face forehead, nose, cheeks and the chin
- Mix outward Make use of a damp makeup sponge or foundation brush to blend the product from the middle of the face towards hairline and jawline
- Build slowly by adding more when needed, rather than implementing the full coverage all over
- Do not forget to include your neck Blend a little across your neck, avoiding obvious lines
Make sure that your foundation evens out your skin tone, and not cover your face in totality. The aim is to enhance appearance, not mask!
Perfecting With Concealer and Setting Powder
Concealer has multiple uses within your routine makeup for those who are new to makeup concealing blemishes, making redness less noticeable, and brightening under-eyes. If you want to conceal your eyes, pick a concealer that is light than the foundation and the consistency of a cream that doesn’t get absorbed into thin lines. To conceal blemishes, ensure that your foundation’s shade is precisely .
Application techniques:
- Under eye Apply to the eyes in an inverted triangle and blend edges gently
- Blemishes Apply directly to the area without spreading the area
- Redness around the nose Make use of a small brush to apply the color precisely
The best way to make sure that makeup is set so that it stays for the entire day long starts with a dusting of powder. Dust setting powder lightly under eyes, around the nose, and on the forehead – places that makeup tends to break down the fastest. Apply the powder to your the skin instead of dragging it across the surface which could cause damage to the foundation. For those with dry skin, apply powder in a controlled manner, whereas oily skin types could require more of a generous application.

Enhancing Your Features: Eye Makeup Explained
Brow Grooming and Eye shadow Basics
Eyebrows that are well-groomed frame your face, so you shouldn’t overlook this step out of the makeup routine, especially for those who are new to makeup. Begin by brushing your brows upwards with a spoolie-like brush Then fill in areas that are sparse with hair-like strokes by using a pencil or powder. Put them in place using clear brow gel that will last for the entire day. hold .
When you are preparing your eyeshadow, keep in mind this principle light shades can bring your the features forward, whereas darker shades are a bit more sombre. This basic understanding will change your game of eye makeup.
Three-shadow simple technique:
- The base shade Apply a neutral shade close to your skin’s color on the your lid
- The color of the Crease Use a medium toned shade to fill in the crease using the motion of a windshield wiper
- Depth: Apply a darker shade to the outer corner, and blend it thoroughly
Mastering Popular Eyeshadow Techniques
After you’ve learned the basics of makeup techniques, you could be interested in trying out specific techniques such as the Halo eye makeup tutorial as well as the cut crease tutorials for those who are new to the field. These styles can create different eye forms and effects that are ideal for special events.
Halo eye technique:
- Cover with a moderate shade of lipstick to your entire lid
- Make sure you place a light, shimmery shade around the middle of the lid
- The inner and outer corners should be enlivened with a dark hue
- Blend thoroughly, ensuring that shades are evenly distributed.
Cut creases for those who are new to HTML0:
- Place a light shade for transition over the crease
- Make use of the concealer “cut” across the crease and create an angular line
- Make concealer set using powder or pigment
- Blend edges slightly to prevent sharp lines
Eyeliner and Mascara Application
Eyeliner defines your eyes while mascara lets them open. For the beginner pencil liners are the most flexible, whereas liquids can create more defined lines. A tightline (applying liner between the lashes) creates definition, but without an clear line.
Mascara tips for maximum impact:
- Wipe wand around the base of lashes, then pull upwards
- Apply a coat on both sides of lashes to increase the length
- Use two coats of paint instead of one thick coat.
- Make use of an eyelash curler prior to mascara to give it extra lift.
Finishing Touches: Blush, Bronzer, Highlighter and Lips
How to Apply Contour and Highlight
Highlighting and contouring appear to be sophisticated but they are based on simple rules. Contour products must be matte as well as slightly lighter than the skin tone in order to create shadows. Highlighters reflect light and bring your the features forward .
Natural contouring:
- Under cheekbones (suck in cheeks to locate the hollow)
- Along the hairline and jawline
- If desired, side of nose
The areas that are highlighted:
- The top of cheekbones
- Bridge of the nose
- Cupid’s bow
- Brow bone
Blend contours and highlight well until no lines are left. The objective is the dimension of the contour, not apparent streaks of color.
Blush and Lip Application
Blush placement can greatly affect the overall appearance. For a natural flush smile and apply the blush to cheeks’ apples, and blend upwards toward the temples. Cream blushes melt into the skin to give a natural look, while powders last longer.
Steps to apply lip makeup:
- Exfoliate gently buff off dry flakes using the soft bristles or a lip scrub
- Hydrate Lip balm, and let it soak in
- Line Liner your lips with a lip liner that matches your lipstick to draw lines
- Fill Color: Apply color from the center outwards, Blotting the layers to ensure longevity
Specialized Makeup Tutorials and Techniques
How to Apply Makeup for a Natural Everyday Look
The natural look concentrates on enhancing, not changing your appearance. This is a great choice for the workplace, school or other occasions when you need to appear professional and isn’t “made up.”
streamlined procedure:
- Tinted moisturizer, or light coverage foundation, instead of full coverage
- Cream products (blush bronzer) that blend seamlessly with the skin
- Brown mascara is better than black to give softer definition
- Lip balm that is tinted, not opaque lipstick
- Concentrate on one aspect such as lips or eyes Not both.
Bridal Makeup Application Tutorial
Bridal makeup tutorial techniques provide a long-lasting and photo-friendly appearance that enhances without being overwhelming. Bridal makeup needs to be a little more defined than normal wear in order to endure the rigors of photographs and endure through the most emotional of moments.
Important bridal considerations:
- Longevity Use primer or setting spray and other products
- Test of photography Test flash photography to test for flashbacks from silica powder or SPF
- Waterproof Formulas that are waterproof: Use them for mascara, liner or even foundation if tears are expected.
- Timelessness Choose traditional over fashionable and you’ll love this look back
How to Apply Makeup for Sensitive Skin
Applying makeup on the skin that is sensitive requires careful selection of the right product and application. The key is to avoid irritation, while still getting beautiful results.
Sensitive skin strategies:
- Test for patch Always test new products on your inner arm prior to applying facial
- Simplify use fewer products that have clear ingredient lists.
- Tools are important Synthetic hair brushes tend to be less irritating than natural hairs.
- Remove with gentle pressure: Make use of oil-based removers that dissolve makeup without rub
- Concentrate on skincare Healthy skin barrier decreases reaction to cosmetics
Conclusion: Embracing Your Personal Makeup Journey
Understanding how put on the right makeup is a process of exploration, not about reaching the perfect look. Begin by learning these essential methods, and gradually try to determine the best way to feel comfortable. Be aware that even makeup artists of the highest caliber began as novices The key to success is constant practice and perseverance with yourself.
Your makeup should reflect rather than hide your beauty. A renowned expert says, “It’s not about the makeup, it’s about the knowledge” . By acquiring these skills you are able to make makeup that is specifically tailored to your personal characteristics such as lifestyle, style, and preference.
What’s your most difficult makeup problem? Share in the comments below and let us know about any other tutorials you’d prefer to look at! Your feedback is helpful in creating content that is tailored to your requirements and concerns.